You can do whatever you want with your finished ami, but please don´t take credit for this pattern, or copy it anywhere.. although it seems very simple, it takes hard work and effort. Hope you enjoy it and thanks for visiting my place!
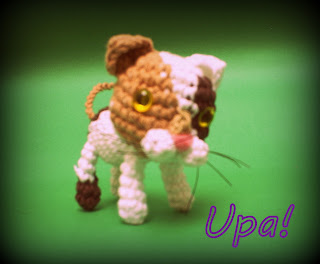
This little kitten are made with cotton thread and 2 mm hook, except the one I used for the Step to step instruction, this is made with mohair and the same hook. For some of them I´ve used 8mm safety eyes, a little piece of felt for the nose and some fishing line for whiskers (optional). They are worked very fast as they are very small. No change colour instruction will be given at this pattern.
Abbreviations:
sc: single crochet stitch
ch: chain
*: repeat until the end of the round
+: increase
- : decrease
MR: Magic Ring
FO: fasten off
sl st: slip stitch
My advice is to crochet all the parts first and then sew them together on the desired position
1: 6sc in MR (6)
2: 6+ (12)
3: [1sc, 1+]* (18)
4: [2sc, 1+]* (24)
5-7: sc* (24)
8: [3sc, 1+]* (30)
9: sc* (30) Place safety eyes between rows 6 and 7, approximately 6 points away from each other.
10: [3sc, 1-]* (24)
11: [2sc, 1-]* (18)
12: [1sc, 1-]* (12) Fill in.
13: 6- (6) FO and close remaining stitches.
1: 5sc in MR (5)
2: 1+, 4sc (6) and FO. Sew to the face.
NOSE
For the nose bridge make 3ch, turn and from the second chain from hook make 2sc. FO. Sew it to the face, in the middle of the cheeks. After this, cut a piece of felt into a triangle shape and glue it under the nose bridge.
1: 5ch. Starting From 2nd chain from hook: 4sc, 1ch, turn.
2: skip the first stitch: 3sc, ch1, turn.
3: skip the first stitch: 2sc, ch, turn.
4: skip the first stitch: 1sc. ch1. 3sl st to the left, ch1, 4sl st in the base, ch1, 4sl st in the last border, 1sl st in first sl st.
Sew both ears to the head, slightly U-shaped to give it depth.
1: 6sc in MR (6)
2: 6+ (12)
3: [sc, 1+]* (18)
4-7: sc* (18)
8: [1sc, 1-]* (12) Fill. FO and sew to the head, having in mind your desired position.
LEGS (X4)
1: 6sc in MR. (6)
2-6: sc* (6) FO and sew to the head, having in mind your desired position.
TAIL
Ch11. Sew to the body.
If you wish, you can embroider around the eyes to give it a more catlike look. And now it´s ready! To use it for a keychain, I made a sorted of collar with 23 chain, 22sc, and a few more chains passing through inside the ring, then sew it around the neck.


No hay comentarios:
Publicar un comentario